
We all love that gorgeous sun-kissed glow that comes with a perfect self-tan.
But if you’ve ever taken to the mitt, you’ll know how challenging it can be to avoid white spots on tricky areas such as the underarms and neck.
In this guide, we share the best way to tan those hard-to-reach areas so that you can enjoy a flawless finish each and every time.
Fake Tanning: How It Works
Firstly, let’s do a quick refresher on how fake tanning works.
Fake tan is a magical little product; it allows us to achieve a sun-kissed, bronzed look without exposing ourselves to harmful UV rays.
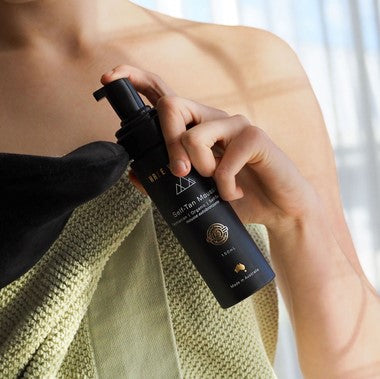
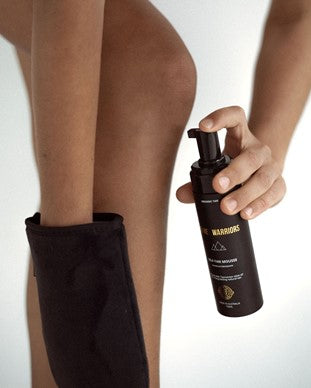
Self-tanners come in different forms, including lotions, sprays, and mousses. So, no matter your preference or skill level, you’ll be able to find a fake tan product that works for you.
The active ingredient in self-tanners is dihydroxyacetone (DHA), which reacts with the amino acids in your skin to produce a brown pigment known as melanoidins. DHA is a plant-derived ingredient and doesn’t harm the skin at all.
It’s a win-win!
Common Challenges When Applying Self-Tanner to Tricky Areas
When done correctly, a fake tan can give you a beautiful, just-returned-from-the-Maldives glow, sans the dangerous sun exposure.
But the key to achieving that perfect tan is knowing how to navigate those tricky, hard-to-reach areas like the underarms and neck.
Applying too much self-tanner or not blending it well can lead to white spots, streaks, or uneven patches, which we absolutely don’t want!
What to Do Before Tanning
While it can be tempting to jump right into your tanning session, proper preparation is essential!
Before applying self-tanner, you’ll need to prepare your skin. This will ensure an even, smooth and streak-free application.
First, exfoliate your skin to remove those pesky dead skin cells that can cause the self-tanner to cling to certain areas. You can use a gentle scrub, like our Tasmanian Sand Scrub, and Exfoliating Glove to buff your skin gently.
After exfoliation, moisturise your skin to keep it hydrated and smooth.
Right before you tan, jump into the shower and wash off any perfumes, oils, moisturisers or other products from your skin. You’ll need a clean, dry base to work with for the best results.

How to Avoid White Armpits When Tanning
White armpits are a common self-tanning problem.
To avoid those unsightly white patches, start by shaving your underarms a day before applying self-tanner to allow your skin to heal.
Keep your underarms bare (that means no deodorant or moisturiser) before you tan. Give your armpits a quick wipe right before applying tan to remove any sweat that may have accumulated there.
Now, for the secret ingredient: after you’ve applied your tan to your underarms, pat on some talcum powder. This will help to keep your underarms dry and prevent the tan from sweating off.
Once you have applied the self-tanner, wait for it to dry before getting dressed.
How to Tan Your Underarms
Let’s look at the best way to tan your underarms.
When using a spray, hold the can about six inches away from your underarms and spray in a downward motion. Be sure to blend the self-tanner well into your skin to avoid streaking.
When using a mousse, apply a small amount onto a tanning mitt and blend it onto your underarms in circular motions.
Fake Tan Not Sticking to Your Inner Arm? Here’s How to Fix it
It can be surprisingly tricky to get fake tan to stick to your inner arm, but here’s how to avoid the problem.
First, ensure that your skin is clean and free from any moisturisers or lotions that could prevent the self-tanner from sticking. Sweat and deodorant tend to travel down from the armpit and into the inner arm, so make sure the area is clean and dry.
The best way to tan your inner arm is to gently rub the tan into your skin with a tanning mitt.
The key is to blend lightly — don’t overdo it. If you blend for too long, the mitt will pick the tan back up, and you’ll be left with white patches. Simply blend until there are no streaks, then you’re good to go.
How to Tan Your Neck
Tanning your neck can be tricky, so it’s important to take the time to prep properly.
To avoid a white neck, start by exfoliating the skin well but gently. The skin on your neck is very delicate, so exfoliate very lightly in circular motions.
Now that your skin is prepped, what’s the best way to tan your neck?
Apply a small amount of self-tanner to a tanning mitt and blend it well into your neck. If you notice any areas where the tan isn’t quite sticking, grab a makeup brush and blend the tan in along the jawline and neck.
The bristles of the brush will allow for a more precise application and will ensure those easy-to-miss spots are covered.
How to Blend Self-Tanner on Your Feet
We’ve all experienced the dreaded orange tan patches on our feet. Those ankles and heels can seem impossible to navigate!
The best way to tan your feet is to first focus on exfoliation.
Start by exfoliating your feet to remove any dead skin cells and moisturising them, paying special attention to the drier areas like your heels, ankles, and the tops of your toes. This will help the self-tanner glide on smoothly and prevent it from clinging to dry patches.
When applying self-tanner to your feet, use a small amount of product and work in sections. Use a tanning mitt or makeup brush to blend the self-tanner evenly, making sure to cover the tops, sides, and soles of your feet.
Be extra cautious around your toes and ankles, as these areas can be prone to streaking.
Remember, less is more when it comes to self-tanning your feet. Take your time and blend thoroughly to avoid any unevenness or tell-tale orange patches.
The Best Way to Tan: Using the Right Tools
To achieve an even and flawless self-tan, you need the right tools.
Without a tanning mitt, exfoliating glove, body scrub, and body lotion, your tan simply won’t deliver that even, golden glow you’re aiming for.
A tanning mitt will help you apply the self-tanner evenly and prevent staining your hands.
Exfoliating mitts and body scrub will help you remove any dead skin cells and create a smooth surface for self-tanning.
Body lotion will keep your skin hydrated and prevent the self-tanner from clinging to dry areas.
What to Use If You Don’t Have a Tanning Mitt
What’s the best way to tan if you don’t have a tanning mitt?
One option is to use disposable gloves, which will protect your hands from the self-tanner while still allowing you to blend the product smoothly onto your skin.
Just a heads up: disposable gloves won’t absorb the tan like a tanning mitt does, so you’ll have some excess product to contend with.
Another option is using a makeup brush, specifically a kabuki brush or a large foundation brush. These brushes can help you apply the self-tanner evenly, and they're great for blending the product in hard-to-reach areas like your neck, underarms, and feet. Just be sure to clean the brush thoroughly after each use to prevent product buildup.
A third option is to use a clean, smooth cloth or a small towel. Simply fold the cloth and apply the self-tanner to the centre of the folded area.
Then, gently rub the cloth onto your skin in circular motions, ensuring the product is evenly distributed. Remember to wash the cloth thoroughly after use to remove any remaining self-tanner.
No matter which alternative you choose, the key to a flawless self-tan is taking your time and blending the product evenly onto your skin.
Post-Tanning Care and Maintenance
Post-tanning care is essential to a long-lasting tan. Avoid showering or sweating for at least six hours after self-tanning to allow the self-tanner to develop fully.
Once you’ve showered, pat your skin dry and moisturise it with a hydrating lotion.
Avoid swimming and exfoliating for at least three days after self-tanning, as these activities can cause the self-tanner to fade faster.
Tips for Prolonging Your Self-Tan
To prolong your self-tan, moisturise your skin daily with a hydrating lotion to keep it smooth and hydrated.
Avoid using harsh soaps or exfoliants, as these can cause your self-tan to fade faster.
Finally, refrain from wearing tight clothing or anything that could cause friction on your skin, as this can cause your self-tan to wear off faster.
The Best Way to Tan: Every Step Counts
Achieving an even and flawless self-tan in tricky areas such as the underarms, neck, and feet can be challenging, but with the right techniques and tools, you’ll end up with a red carpet-worthy glow every time.
Remember to prepare your skin before self-tanning, use a small amount of self-tanner, and blend it well into your skin to avoid white spots or streaking.
Finally, take care of your skin after self-tanning and follow these tips to prolong your self-tan.
Need more advice on the best way to tan? We’re here to help you get your glow on! Get in touch with us to learn more.
Back to Blog